- Joined
- Dec 23, 2009
- Messages
- 25,489
- Reaction score
- 6,865
Lets get started with some basic terminology.
What is rooting: rooting gives the user permissions that is normally not allowed, this is called superuser permissions. This allow you the ability to write, modify, or change system files. This is indicated by the superuser Icon. So if you see the superuser you are rooted. Why is this important: this allow you to do a number of things from deleting system apps, running apps that require root (superuser permissions), and modify many different set ups on your device. We will also talk about the bootloader and the difference between a locked and an unlocked bootloader, roms, themes, and custom recoveries.

Theme: Theme allows users to modify the look and color of image files for their device. This allows the user to change the color of icons, notification bars, and other images on the phone.
ROMS: ROM, which stands for read only memory, for android is a customized version of the android operating system. A developer modified the original o.s. to make changes that add or change the way it
looks and feels
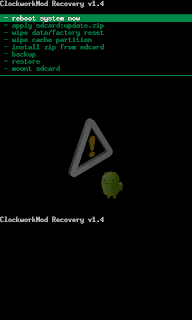
Recovery Mode/image: This is used to boot into a safe mode; this is used to install roms, restore/ create backups, and basically recovery your device from a failed rom.
Bootloader: This is used to diagnose issues and can be used to change the images on the internal RAM.
Nandroid: this allow users to restore their device to the same condition of the backup file. It is highly recommended that a nandroid backup be made before flashing (aka installing) any roms.
There are many benefits to rooting, I like the fact that I can back up my device with nandroid backups, loading up custom roms, overclocking my processor to a higher speed.
I am going to talk about the pro/cons to rooting/roming/theming/overclocking.
Rooting: Though rooting by itself does not change any features on your device it is against both Manufacturers and cell phone company warranty agreements. If you root your device and it breaks your device then technically you violated your warranty. There are processes to unroot your device and return in to factory specifications. The process of rooting/unrooting will be in in its respective threads for certain devices.
Flashing Roms: Flashing a rom allows users to change the way your system operates. Each rom operates in its own unique way. The negative to flashing a rom is that if you flash a rom with low battery power it could result in boot looping (this is the result of your phone trying to load up and restarting before getting to the start up page). It is recommended that you root with 60% or more battery power. The battery in the notification bar of most android devices do not go yellow until 30% and that is too low to flash a rom or root. It is recommended that a battery widget or something is in place to ensure that a rom is being flashed at 60% or more power. If you do not have 60% charge up the device until you do. The other issue with flashing a rom is the rom causes your device not to function properly, cause constant foreclosing, or bootlooping. This can be fixed by rebooting into recovery and restoring the nandroid backup that you made before flashing a rom. After the backup is restored check to ensure the battery is at the magic number of 60% before flashing another Rom. Before flashing any rom it is important to do research about the rom. Has the rom caused problems for other users, what kind of problems, have the problems been fixed, does the rom or dev have a reputation. It is very important that you read and follow the instructions laid out by the developer for installing the rom. If you are not sure take an extra few minutes to get an understanding. The extra 15 mins could save you the headache and pain of having to get your device working again. Take the time to get all the files needed and organized, ensure you understand what is going on, what the rom is suppose to do, and have a back up plan in case the rom fails.
Overclocking: overclocking allows you to increase your processor speed to a setting higher then recommended by the manufacturer. By overclocking your device you are causing it to work harder and as a result the life of the processor is decreased and both the battery and the processor heats up. Overclocking is done by installing an overclock kernel. Is over clocking needed: no. In all reality o/c may allow your device to run a program a second or 2 faster then normal. Is overclocking beneficial; yes, by overclocking some devices can process apps, web browsing experience, device navigation smoother and faster then at the stock setting. The negatives to overclocking is you can overheat your processor, cause your phone and battery to get hotter then normal causing your battery to drain faster. Though some devices may get hot using nav apps the difference is that if you device is at stock and a nav app burns up your device then your warranty will cover it. If you overclock and an app burns up your device then the manufacturer may not cover it. It is highly recommended that you research the overclock kernel and follow the developers instructions, that you have a monitoring tool to ensure the temperature is not getting too hot. That you create a nandroid backup before installing an overclock kernel. And that you do not install a kernel unless you have at least 60% battery life. If the kernel results in your device boot looping or cause your device to reboot randomly you will need to install a different kernel or restore your nandroid backup. Research is your friend, read up and check for any issues as a result of the installation of different kernels. Remember that the only one responsible for anything happening to your device is you.
Theme: As stated before, themes are the changing of icon colors, borders colors, notification bar colors. Themes can either be done by some one else or by following a guide to do it yourself. Remember to create a backup before installing a theme. Follow all instructions by the developer or the guide to theme.
Rooting provides an opportunity to mod you device in ways to customize it the way you choose. But there are ways to customize you device with out rooting. If you decide to root and customize your device it is always recommended that you understand what is going on before you do it. If you install an app that roots and install roms for you and you have no clue what is going on or how to root manually, then if a problem arises you will not know what to do to resolve it. Being that its your hard earned money, it is important that you know what is on your phone, who made it, and how to install and remove it. If you are unsure what to do then you should get a full understanding before continuing. The last thing you want is to have a $600+ device that is a paperweight while you panic figuring out what to do.
The method of flashing different roms and kernels are listed with their respective roms and developers. Pay attention to which recovery image you have, is the rom compatible with your device, is the rom compatible with your recovery image, what method is required to install, are there any prerequisites, have the developer noted any problem or issues, have other users noted any problem or issues, the method to uninstall the rom, does the rom only work with specific kernels, or kernels work with specific roms. Make sure a nandroid backup is performed before installing and that you have 60% or more battery life.
I have come across people who were to scared to root so they give it to a buddy to do or they rely on an app to do it all for you. The problem with that is if your buddy install a rom and the rom conflicts with your device you will not know how to fix it. This thread is meant to educate you so you can learn the basics to install your own roms, or if an app does install it for you, you will be prepared to fix any problems that may arise.
It is important to understand what you are putting on your device, what effect it may have, and what does it alter. Unless you are advanced I do not recommend beta testing of roms. If the rom does not have a good reputation then more then likely you will experience the same problem other are experiencing. Give yourself ample time to flash a rom and deal with potential issues. I would not flash a rom at work, right before work, or during a lunch break. If you have an issue then you may not be able to get or give the attention needed to fix the problem.
What is rooting: rooting gives the user permissions that is normally not allowed, this is called superuser permissions. This allow you the ability to write, modify, or change system files. This is indicated by the superuser Icon. So if you see the superuser you are rooted. Why is this important: this allow you to do a number of things from deleting system apps, running apps that require root (superuser permissions), and modify many different set ups on your device. We will also talk about the bootloader and the difference between a locked and an unlocked bootloader, roms, themes, and custom recoveries.

Theme: Theme allows users to modify the look and color of image files for their device. This allows the user to change the color of icons, notification bars, and other images on the phone.
ROMS: ROM, which stands for read only memory, for android is a customized version of the android operating system. A developer modified the original o.s. to make changes that add or change the way it
looks and feels
Recovery Mode/image: This is used to boot into a safe mode; this is used to install roms, restore/ create backups, and basically recovery your device from a failed rom.
Bootloader: This is used to diagnose issues and can be used to change the images on the internal RAM.
Nandroid: this allow users to restore their device to the same condition of the backup file. It is highly recommended that a nandroid backup be made before flashing (aka installing) any roms.
The Benefits of rooting
There are many benefits to rooting, I like the fact that I can back up my device with nandroid backups, loading up custom roms, overclocking my processor to a higher speed.
I am going to talk about the pro/cons to rooting/roming/theming/overclocking.
Rooting: Though rooting by itself does not change any features on your device it is against both Manufacturers and cell phone company warranty agreements. If you root your device and it breaks your device then technically you violated your warranty. There are processes to unroot your device and return in to factory specifications. The process of rooting/unrooting will be in in its respective threads for certain devices.
Flashing Roms: Flashing a rom allows users to change the way your system operates. Each rom operates in its own unique way. The negative to flashing a rom is that if you flash a rom with low battery power it could result in boot looping (this is the result of your phone trying to load up and restarting before getting to the start up page). It is recommended that you root with 60% or more battery power. The battery in the notification bar of most android devices do not go yellow until 30% and that is too low to flash a rom or root. It is recommended that a battery widget or something is in place to ensure that a rom is being flashed at 60% or more power. If you do not have 60% charge up the device until you do. The other issue with flashing a rom is the rom causes your device not to function properly, cause constant foreclosing, or bootlooping. This can be fixed by rebooting into recovery and restoring the nandroid backup that you made before flashing a rom. After the backup is restored check to ensure the battery is at the magic number of 60% before flashing another Rom. Before flashing any rom it is important to do research about the rom. Has the rom caused problems for other users, what kind of problems, have the problems been fixed, does the rom or dev have a reputation. It is very important that you read and follow the instructions laid out by the developer for installing the rom. If you are not sure take an extra few minutes to get an understanding. The extra 15 mins could save you the headache and pain of having to get your device working again. Take the time to get all the files needed and organized, ensure you understand what is going on, what the rom is suppose to do, and have a back up plan in case the rom fails.
Overclocking: overclocking allows you to increase your processor speed to a setting higher then recommended by the manufacturer. By overclocking your device you are causing it to work harder and as a result the life of the processor is decreased and both the battery and the processor heats up. Overclocking is done by installing an overclock kernel. Is over clocking needed: no. In all reality o/c may allow your device to run a program a second or 2 faster then normal. Is overclocking beneficial; yes, by overclocking some devices can process apps, web browsing experience, device navigation smoother and faster then at the stock setting. The negatives to overclocking is you can overheat your processor, cause your phone and battery to get hotter then normal causing your battery to drain faster. Though some devices may get hot using nav apps the difference is that if you device is at stock and a nav app burns up your device then your warranty will cover it. If you overclock and an app burns up your device then the manufacturer may not cover it. It is highly recommended that you research the overclock kernel and follow the developers instructions, that you have a monitoring tool to ensure the temperature is not getting too hot. That you create a nandroid backup before installing an overclock kernel. And that you do not install a kernel unless you have at least 60% battery life. If the kernel results in your device boot looping or cause your device to reboot randomly you will need to install a different kernel or restore your nandroid backup. Research is your friend, read up and check for any issues as a result of the installation of different kernels. Remember that the only one responsible for anything happening to your device is you.
Theme: As stated before, themes are the changing of icon colors, borders colors, notification bar colors. Themes can either be done by some one else or by following a guide to do it yourself. Remember to create a backup before installing a theme. Follow all instructions by the developer or the guide to theme.
Rooting provides an opportunity to mod you device in ways to customize it the way you choose. But there are ways to customize you device with out rooting. If you decide to root and customize your device it is always recommended that you understand what is going on before you do it. If you install an app that roots and install roms for you and you have no clue what is going on or how to root manually, then if a problem arises you will not know what to do to resolve it. Being that its your hard earned money, it is important that you know what is on your phone, who made it, and how to install and remove it. If you are unsure what to do then you should get a full understanding before continuing. The last thing you want is to have a $600+ device that is a paperweight while you panic figuring out what to do.
The Process Of rooting and flashing roms/kernels
The method of flashing different roms and kernels are listed with their respective roms and developers. Pay attention to which recovery image you have, is the rom compatible with your device, is the rom compatible with your recovery image, what method is required to install, are there any prerequisites, have the developer noted any problem or issues, have other users noted any problem or issues, the method to uninstall the rom, does the rom only work with specific kernels, or kernels work with specific roms. Make sure a nandroid backup is performed before installing and that you have 60% or more battery life.
I have come across people who were to scared to root so they give it to a buddy to do or they rely on an app to do it all for you. The problem with that is if your buddy install a rom and the rom conflicts with your device you will not know how to fix it. This thread is meant to educate you so you can learn the basics to install your own roms, or if an app does install it for you, you will be prepared to fix any problems that may arise.
It is important to understand what you are putting on your device, what effect it may have, and what does it alter. Unless you are advanced I do not recommend beta testing of roms. If the rom does not have a good reputation then more then likely you will experience the same problem other are experiencing. Give yourself ample time to flash a rom and deal with potential issues. I would not flash a rom at work, right before work, or during a lunch break. If you have an issue then you may not be able to get or give the attention needed to fix the problem.