[How-To] DIY SoftKeys Mods

CJM

Super Moderator
Staff member
Premium Member
Rescue Squad
Joined
Sep 12, 2010
Messages
10,600
Reaction score
1,747
Location
Mississippi Gulf Coast
Current Phone Model
Nexus 6
Twitter
https://twitter.com/Corey
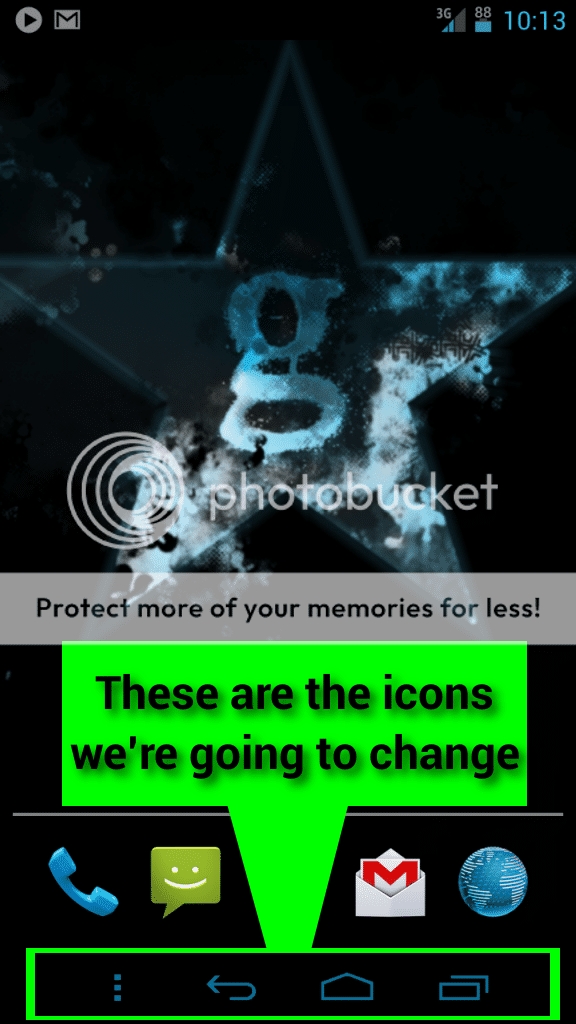
This is a discussion about changing your softkey icons
Screenshot_2012-01-17-10-13-13.png


Before starting this guide, you need to be comfortable in making backups & dealing with any issue that may arise (Bootloops, Force Close, etc). Galaxy Nexus Forums or myself take no responsibilty for any damage to your phone or pride.


Some things you'll need.
7Zip - 7-Zip <--To open roms & apps to replace the icons
Gimp2 - GIMP - The GNU Image Manipulation Program <--To edit & resize icons, if needed.
Your rom saved to your computer or, if you have a SoftKey mod you'll need that zip file instead.
Organization - <--The only thing I can't provide you. But I'll try to show you what helped me.


First we need to find the app that has the softkey icons.
NOTE: If you have a softkey mod installed that gives you more than the normal 3 softkeys, you need to perform this proceedure on the SoftKey mod's zip file not the rom. The SystemUI.apk in that file has the Search icon along with the others. If you have a SoftKey mod installed and modify your rom's SystemUI.apk & not the mod's, your search key icon will not change.
ALSO: If you have icons ready to flash, skip to Replacing the Icons.

Here's some icons I've made here: http://www.droidforums.net/forum/galaxy-nexus-themes/195139-diy-custom-softkeys.html

The icons for the softkeys are located in the SystemUI.apk. Make sure your current rom( or SoftKey Mod) is on your computer & use 7zip to open it by right clicking on the rom and select 7zip, then "Open Archive". Once opened, double click your way to /system/app/SystemUI.apk. Take the SystemUI.apk out & drag it to a folder on your computer. Otherwise we'll be changing that app in the rom. It's always a good idea to keep the rom original & edit parts of a rom separately. That way you'll always have the same base to go back to. You can also edit the SystemUI.apk later without changing the rom. Once the SystemUI.apk is in it's separate folder, you can close this 7zip window. Then open that folder, with the SystemUI.apk, and keep it opened.


Now we need the icons.
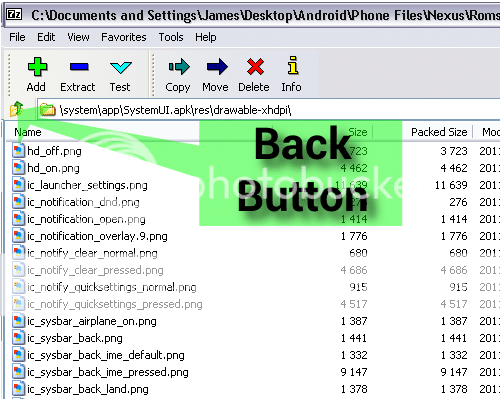
Back to the open folder that has the SystemUI.apk you just pulled from the rom, open the SystemUI.apk with 7Zip. Double click your way to /res/drawable-xhdpi. The softkey icons are called;
ic_sysbar_back-1.png
-ic_sysbar_back.png
ic_sysbar_back_land-1.png
-ic_sysbar_back_land.png
ic_sysbar_highlight-1.png
-ic_sysbar_highlight.png <--These are what shows up behind the softkeys when pressed.
ic_sysbar_highlight_land-1.png
-ic_sysbar_highlight_land.png
ic_sysbar_home-1.png
-ic_sysbar_home.png
ic_sysbar_home_land-1.png
-ic_sysbar_home_land.png
ic_sysbar_lights_out_dot_large-1.png
-ic_sysbar_lights_out_dot_large.png
ic_sysbar_lights_out_dot_small-1.png
-ic_sysbar_lights_out_dot_small.png
ic_sysbar_menu-2.png
-ic_sysbar_menu.png and/or
ic_sysbar_menu_stock.png
-ic_sysbar_menu_stock.png
ic_sysbar_menu_land-2.png
-ic_sysbar_menu_land.png and/or
ic_sysbar_menu_stock_land.png
-ic_sysbar_menu_stock_land.png
ic_sysbar_recent-1.png
-ic_sysbar_recent.png
ic_sysbar_recent_land-1.png
-ic_sysbar_recent_land.png
ic_sysbar_search-1.png
-ic_sysbar_search.png <--In the SoftKey Mod. These are from Th3ory Rom's SoftKey Mod
ic_sysbar_search_land-1.png
-ic_sysbar_search_land.png <--In the SoftKey Mod


Now to edit/change out the icons.
Now that you have the icons, it's time to change them out. I pull them out of the drawable-xhdpi folder that's open in 7Zip and place them in a separate folder on my comupter to edit them. I found placing them in the same folder that the SystemUI.apk is in, helps keep things organized. It will also help to save your edited/new icons to this folder for this guide. Leave 7Zip open, we'll be going back to that folder.

You can now do a few different things at this point.
1.) You can open the icons in Gimp and edit the color, shape, etc. NOTE: Some of these icons are Indexed and not in RGB. You have to change it to RGB to change the color. In Gimp, this is done by hitting the "Image" button at the top of the window that the icon is open in. Then select Mode > RGB. The new icon doesn't have to be Indexed in the end. It can be saved as RGB.

2.) You can find other icons or text to replace the stock icons. Just be sure to take note of the stock icons pixel size and use the same sized icons to replace them. If you need to resize icons, Gimp or another photo editing program will do that. Also make sure they are named exactly the same as the stock icons or this will not work.


Replacing the icons.
Once you have your new icons, you're ready to put them back in the drawable-xhdpi folder thats still open in 7Zip. Just drag them from the folder on your computer into the drawable-xhdpi folder thats open in 7zip. It will ask if you want to copy the files to the archive, select "Yes".Then press the "Back Button" until you are in the app folder, looking at the SystemUI.apk. If 7Zip gives you another pop-up window about updating the zip file, select "Yes". You can close this 7Zip window now. Just keep the window that has the new SystemUI.apk in it open.
Back_Button_7Zip.png


Preparing the new SystemUI.apk to flash.
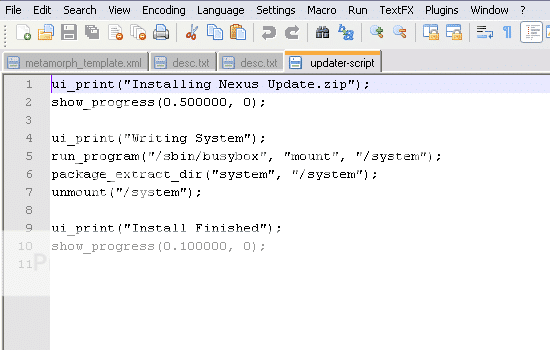
Now you're ready to flash. We just have to place your new SystemUI.apk in an update.zip file so you can flash it through CWM recovery. You can also do this with MetaMorph or ADB.
For MetaMorph instructions go Here.
For ADB. Open Command Prompt and "cd" to where your SystemUI.apk is & type:
Code:
adb push SystemUI.apk /system/app/SystemUI.apk
For flashing in recovery, just keep following along.

Download this blank update.zip - blank_Galaxy_Nexus_update - Minus.com

Once the update.zip is downloaded to your computer, use 7Zip to open it & go to the systemapp folder. Now to drag & drop your new SystemUI.apk from its folder to the blank update.zip open in 7Zip. Make sure you place it in the app folder of the blank update.zip. Use the "Back Button" to back out of the zip, then you can close 7Zip.

You can also rename the update.zip anything you'd like now too.


Flashing.
Now we're going to flash it just like a theme, no need to wipe. You can wipe your Cache & Dalvick Cache, if you'd like. This won't erase any data.
Connect your phone to your computer and place the new update.zip on your sd. Any folder will work, as long as you know where it is.
Boot into CWM recovery, flash it & enjoy your hard work.

Once you get the idea about how to change these icons, just about any icons can be changed using the same steps. And multiple apps can be installed by placing the in the correct folders of the update.zip. If the rom shows other folders that are not in the update.zip, you can create them if needed. Folders that are left empty will not effect the install of this update.zip.


Instructions for using Metamorph here: [How-To] Softkey Mods [WIP] installs with MetaMorph
 
Last edited:
OP
CJM

CJM

Super Moderator
Staff member
Premium Member
Rescue Squad
Joined
Sep 12, 2010
Messages
10,600
Reaction score
1,747
Location
Mississippi Gulf Coast
Current Phone Model
Nexus 6
Twitter
https://twitter.com/Corey
Changing the updater-script text.


Some things you'll need.
Notepad++ - Notepad++ Home <--To open & edit the updater-script. Also used on other android files to edit color(not covered in this guide).
The update.zip from the post above with your changes in it. <--This is where we'll get the updater-script from.


This is the text that shows the progress of the zip while flashing in CWM recovery. Using the update.zip I provided, it will look like this;
"Installing Nexus Update.zip"


"Writing System"


"Install Finished"

  • By changing your own icons, what you are basically doing is making your own theme. So why not put your name on it.


Find the updater-script.

Open your update.zip with 7Zip and double click your way to \META-INF\com\google\android\

Once there, you'll see the updater-script. Leave this window open, we'll be placing our new one here.


Edit the updater-script.
You'll need to pull this out & place it on your computer. The folder with the update.zip is a good place. Notepad++ will not save the file if its open in 7zip, so we have to pull it out first. And in case you mess up your updater-script, you can redownload the update.zip in the post above & re-use the updater-scrpit from it.

Once the updater-script is on your computer, open it with Notepad++. Either by double clicking it and selecting a program or by right clicking it.

Once open, it will look like this;
updater-script.png


For this guide, only change whats in the lines that have ui_print(" "); , which are lines 1, 4 & 9. If there are any changes to any other lines, I can not tell you what would happen. But it would not be good.

Any text inside the (" ") can be changed. If you happen to erase the ";" behind the last ")", make sure you add it back. Every line needs that at the end of it.


This is where some have gotten creative. You may recognize some of these;

From Th3ory Rom. ZYGOT3 1.8
" THIS IS ZYGOT3 1.8 "
" By DROIDTH3ORY "
" Presented by TH3ORYROM "


From Android RevolutionHD 2.1.2
"=============================="
" Android Revolution HD "
" by mike1986 "
" Be patient - 1st boot may take a while "
"=============================="


And from the famous Chevyno1, SS5.5 for the Original Droid
"*******************************************"
"* *"
"* Simply Stunning v5.5 - 08-18-2011 *"
"* Gingerbread 2.3.5 Built From Source *"
"* *"
"* [email protected] *"
"* www.droidforums.net/forum/ChevyNo1 *"
"* *"
"************************************************"


For example, to make one like ZYGOT3's, it would look like this in Notepad++;

This is just an example. I don't recommend putting anyone else's name on your work.
updater-script_2.png


You can add as many lines of ui_print(" "); , under lines 1, 4 & 9, as you want & this wont effect the install of the zip (and yes, this will give you more lines than you started with, thats ok). Just don't disturb any other lines. The worst that could happen is the zip doesnt flash and/or you have to install a backup if the phone doesn't reboot into android.

Once you're happy with it, save it in Notpad++. The finished copy is now in your folder & you can close Notepad++.


Replacing the updater-script.
Move your new updater-script from its folder to your update.zip thats still open in 7Zip. You can delete the one thats in 7Zip or just drag and drop the new one there. Click "Yes" if any box pops up.
Back out of the zip & close 7Zip.
You're done.
 
Last edited:

smalltowngirl13

Administrator
Staff member
Joined
Jan 9, 2010
Messages
7,044
Reaction score
912
Location
Kansas
Current Phone Model
Z Force 2
Twitter
smalltownlife13
I wondered why this wasn't over here yet... ;)...
 
OP
CJM

CJM

Super Moderator
Staff member
Premium Member
Rescue Squad
Joined
Sep 12, 2010
Messages
10,600
Reaction score
1,747
Location
Mississippi Gulf Coast
Current Phone Model
Nexus 6
Twitter
https://twitter.com/Corey
I wanted a few to try it on a smaller forum before I posted it here. To give me time to work out the kinks. I haven't heard of anyone having problems & everyone that's tried it seems to think its easy & straight forward.
 

Shibbdroid

Member
Joined
Oct 31, 2011
Messages
151
Reaction score
2
Could I change the highlight color using this? I'm not new to android, but I'm trying to learn to theme. I want to make a black and yellow theme.

Sent from my Galaxy Nexus using DroidForums
 
OP
CJM

CJM

Super Moderator
Staff member
Premium Member
Rescue Squad
Joined
Sep 12, 2010
Messages
10,600
Reaction score
1,747
Location
Mississippi Gulf Coast
Current Phone Model
Nexus 6
Twitter
https://twitter.com/Corey
Could I change the highlight color using this? I'm not new to android, but I'm trying to learn to theme. I want to make a black and yellow theme.

Sent from my Galaxy Nexus using DroidForums

Yes. Just be careful because some of those may be .9.png's & those can be temperamental. In fact, just about any icon in any app can be changed/swapped using this method.
 

Shibbdroid

Member
Joined
Oct 31, 2011
Messages
151
Reaction score
2
Yes. Just be careful because some of those may be .9.png's & those can be temperamental. In fact, just about any icon in any app can be changed/swapped using this method.

Cool well I'm gonna start trying to create my theme today then. If I run into some problems are you willing to help me along?

Sent from my Galaxy Nexus using DroidForums
 

Shibbdroid

Member
Joined
Oct 31, 2011
Messages
151
Reaction score
2
And one more question. Is it OK if I use you menu key in my theme. The 4 line one not the dots.

Sent from my Galaxy Nexus using DroidForums
 

Shibbdroid

Member
Joined
Oct 31, 2011
Messages
151
Reaction score
2
Dude CJM I appreciate you putting this on Here I never thought I'd be able to theme but you made it so easy. Check it out only took 5 mins. Luckily I'm very familiar with gimp. Screenie on next post

Sent from my Galaxy Nexus using DroidForums
 

xkape

Premium Member
Premium Member
Theme Developer
Joined
Jul 27, 2010
Messages
3,882
Reaction score
37
Location
OH-IO
You wouldn't happen to know where the background is controlled at would you?
 

Shibbdroid

Member
Joined
Oct 31, 2011
Messages
151
Reaction score
2
I'm now trying to edit the mms.apk. I want to make the icon all black with yellow eyes and mouth. I noticed there is 3 different images. Would I have to edit all of them? I can't thank you enough for this I've been trying to get into theme for months but couldn't figure it out.

Sent from my Galaxy Nexus using DroidForums
 
OP
CJM

CJM

Super Moderator
Staff member
Premium Member
Rescue Squad
Joined
Sep 12, 2010
Messages
10,600
Reaction score
1,747
Location
Mississippi Gulf Coast
Current Phone Model
Nexus 6
Twitter
https://twitter.com/Corey
You wouldn't happen to know where the background is controlled at would you?

The one behind the softkeys? No I don't. I haven't thought about changing that. But I would only guess it's in an xml somewhere. Messing around, trying to put the app drawer icon in the softkeys, I made them disappear & the dock bar moved down to where the softkeys were. Which made it impossible to back out an app. Obviously didn't work like I wanted it to. But just to ask, you're not talking about the ic_sysbar_highlight.png are you? Don't think you are, but just asking.
 
Top