Troubleshooting guides/Clockwork recovery guide

Status
Not open for further replies.

pc747

Regular Member
Rescue Squad
Joined
Dec 23, 2009
Messages
25,489
Reaction score
6,865
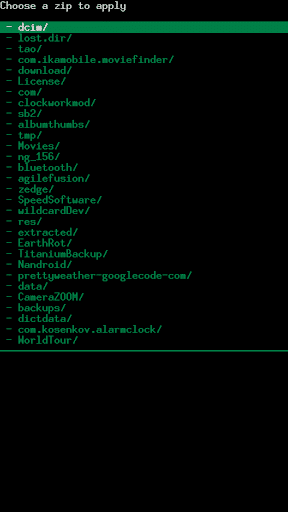
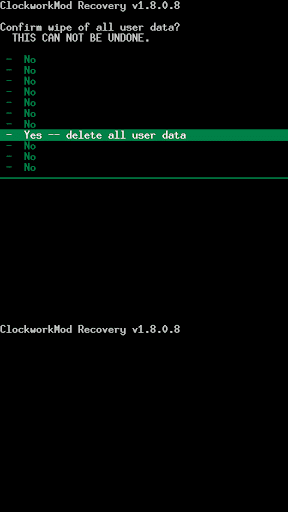
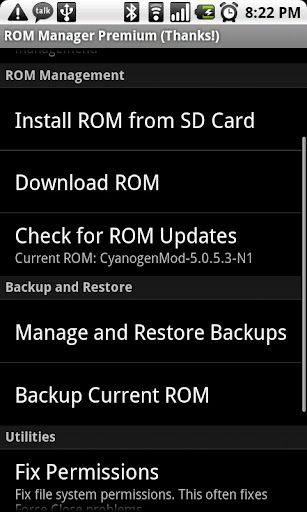
We will be making a series of troubleshooting guides to help people diagnose their problems and possibly help resolve them. The guides do not show every scenario, just the most common issues and solutions.
Hope the troubleshooting guides are helpful.
 
Last edited:
OP
pc747

pc747

Regular Member
Rescue Squad
Joined
Dec 23, 2009
Messages
25,489
Reaction score
6,865
My Droid will not load past the "M"

My phone is stuck on the M.

1) Does your battery have a charge or have it been on the charger for at least 30 mins.

a) yes it has been on the charger for 30 + mins. Move on to step 2

b) no or idk. Charge for at least 30 mins them try again. Fixed the problem then you are done. No fix move to step 2

2) Are you rooted (yes) / (no)
a) (yes) move to step 3
b) (no) Remove battery and try again. If still no fix then try to boot into recovery (those updated to 2.1 official ota will not be able to boot into recovery). If successful do a factory reset then reboot.

How to boot into recovery


While holding “X” on the physical keyboard, hold the power button to turn on the phone. You may let go of the power button, but do not let go of X.
root_6.png

After a few seconds, an Exclamation Mark icon will appear. You may now let go of X. To access Recovery Mode from the exclamation mark icon, hold the volume up button and then press the camera button.
root_7.png

hr.png


3) For clockwork rom see step 5
For Sprecovery see step 4

4) reboot in to recovery and restore nandroid backup (if your last rom was clean then you can do a simple restore latest) go in to advanced and locate you last working rom. Restore reboot. If this does not work further troubleshooting required see RS for further assistance.

How to boot into Sprecovery and restore from backup:
root_6.png

After a few seconds, a green-gold colored Android logo should appear behind the SPRecovery Console menu.
backup_1.png

Perform Restore Navigate to the “backup/restore” menu until you see the 4 Nandroid options. This time we will select “Simple Nandroid restore (latest)”.
backup_5.png

Once again the process is completely automatic. Just like in the backup, you will see a progress bar and informative text. After a few minutes, the restore process will be complete. You will see “(done)” towards the bottom.
Using “Simple Nandroid restore (latest)” is useful if you simply want to return to your most recent backup. However, if you want to restore to a specific backup out of a group, you will need to select “Advanced Nandroid restore”. The first menu option is “Choose backup”; select this.

backup_6.png

You will now be presented with a list of your backups. If you’ve only made one, it will be the only option. Select the backup you’d like to revert to
.
backup_7.png

It will take you back to the previous menu where you can select and deselect certain areas of the backup to restore. You will also see the chosen backup displayed on the top. Keep the default options of BOOT, DATA, and SYSTEM checked and select “Perform Restore”
.
backup_8.png


Sprecovery is the standard recovery image used for droids. It is known for its blue letters up top for its option screen and gold letters going through the green android in the center.


5) Restore a backup from clockwork or nandroid. If it fixes your problem then you are done, if it did not fix see step 5b

How to boot into clockwork recovery:

Booting into clockwork recovery is the same as booting into sprecovery; power off then power on while holding the x key.

main.png
directory.png


Clockwork recovery is a recovery used for Koush roms and rom manager. It is distinguished by the green words with the words clockwork recovery towards the bottom.

5b) Install a clean rom through the update.zip. Do this by clicking on mount sdcard; then mass usb storage. Fix yes, if it did not fix move to 5c

5c) Use rsdlite to do a factory restore. (Unroot/Unbrick your phone using .sbf)


Droid images and tutorials are made by Big Lou at: rootyourdroid.info text in blue shows tutorials from rootyourdroid.info. Everything you need to know about rooting. Check out root your droid @ Start Here | Root Your Droid

Clockwork recovery is a product of Koush. Rom manager and Clockwork is the work of Koush. Further details of his work can be found @ CyanogenMod | Android Community Rom based on Donut tree.
 
Last edited:
OP
pc747

pc747

Regular Member
Rescue Squad
Joined
Dec 23, 2009
Messages
25,489
Reaction score
6,865
Clockwork Recovery Troubleshooting guide

I would like to thank all the members of the rescue squad for their help; we have put a lot of work into this and I hope it helps out the forum community. Also want to thank Koush for adding his insight to help us get this guide off the ground.

If this guide helps you it is a group effort that made this happen and here are the people who deserve the praise:

Koush
Jim Mariner
RolaDroid
Jstafford1
BacknBlack
Christim
Tanknspank
AnneDroid
Jonny Kansas
mwhartman
natediddy
RinTinTigger
 
OP
pc747

pc747

Regular Member
Rescue Squad
Joined
Dec 23, 2009
Messages
25,489
Reaction score
6,865
Clockwork Recovery/ Rom manager Troubleshooting guide

We have seen that people were having issues dealing with clockwork recovery and ROM Manager. We have put together a guide to deal with the common issues seen. This guide will not cover all scenarios, but will cover the most common.

Problem 1: I just installed Rom Manager and installed a ROM. Now it will not allow me to use Rom manager, set cpu, or root related file. I am getting the message that these applications require Root.

Step 1) Download a rom with a zip file (example would be ROMs like BB, SS, UD, or Cyanogenmod) Download Links: (Instructions Below)


http://koush.romraid.com//motorola/s....0.6-test4.zip (Updated - can be used with both SPRecovery AND ROM Manager)

Step 2)
Place the file on the root of your sdcard (that means that it does not get placed in any folders)


Step 3 ) Reboot in to recovery (Power off. Power on while holding the physical "x" key)

Step 4)
Click the option " Install zip from sdcard"
cw%20install%20zip.png


Step 5) Find and choose the file CyanogenMod 5.0.5.7 (or the Rom you chose to install)


clkwrk%20sdcard.png


Step 6) Wipe data

cw%20wipe%20data.png
cw%20wipe%20data%20yes.png


Step 7)
wipe cache


cw%20wipe%20cache.png


Step 8) Reboot system


clkwrk%20main%20page.png


Note: If you used CyanogenMod 5.0.5.7 to fix the issue and choose to install another ROM; make sure you wipe data and cache every time you install a new ROM. If you are worrying about having to reinstall apps. You can install a program to back up apps such as Astro and Titanium Backup. Titanium backup has an option to restore data. A big reason for a lot of the boot loop issues we are seeing are a result of not wiping data and cache in between installing a new ROM.


Problem 2: I installed a Rom from Rom manager and I am now having boot loops.

1) Is your battery dead
- yes or idk: charge battery for 40+ minutes with the wall charger. Fix / No fix go to step 2
- no, battery is above 50% go to step 2

2) Reboot into recovery mode
- restore the nandroid backup you made. If it did not fix or you do not have a backup go to step 3

cw%20main%20screen%20nandroid%20selected.png
cw%20nandroid%20restore.png


cw%20image%20to%20restore%202.png


clkwrk%20main%20page.png


3)
Reboot into recovery
- click the mount sdcard option
- click partition menu
- click mount usb storage (you now have access to your sdcard in recovery)
- Install another ROM (ie CyanogenMod 5.0.5.7)
- push the power menu to get back to the main menu
- click Install zip from sdcard
- choose the ROM (ie CyanogenMod 5.0.5.7)
- wipe data the cache
-Reboot system.
- Fixed the problem.
-Did not fix go to step 4

clkwrk%20main%20page.png
cw%20partitions%20menu.png
cw%20install%20zip.png


clkwrk%20sdcard.png
cw%20wipe%20data.png
cw%20wipe%20data%20yes.png


cw%20wipe%20cache.png
clkwrk%20main%20page.png


Note: If you used CyanogenMod 5.0.5.7 to fix the issue and choose to install another ROM; make sure you wipe data and cache every time you install a new ROM. If you are worrying about having to reinstall apps. You can install a program to back up apps such as Astro and Titanium Backup. Titanium backup has an option to restore data. A big reason for a lot of the boot loop issues we are seeing are a result of not wiping data and cache in between installing a new ROM.


4) As a very last resort use the unroot/ unbrick sbf file. (Unroot/Unbrick your phone using .sbf)

Problem 3:
My phone will not turn on

1) Is your phone charged
- yes; it has at least 50+% power. Go to step 2
- no; place phone on wall charger for 40 minutes or more.
- fixed
- did not fix; go to step 2

2) Remove the sdcard from the slot behind the battery. Put in the sdcard slot in you computer, or another device that reads sdcards, reformat the sdcard. Reinstall sdcard and power on.
- fixed
- did not fix go to step 3

3) Boot in to the boot loader and follow the steps to unbrick/ unroot using sbf/ (Unroot/Unbrick your phone using .sbf)
- fixed
- did not fix go to step 4

4) If there is another droid around or you have a spare battery. Switch out batteries.
- fixed; go to Verizon and tell them you battery is bad
- did not fix; take to Verizon


Problem 4: When trying to install the DM updater app I get the following message "Your SD card is not mounted. If your SD card is mounted on your computer, you must eject it before running DM updater".


cw%20dmu11.png


Step 1) Go into Rom manager.


cw%20rom%20manager.jpg


Step 2) Flash Alternative Recovery image (Sprecovery)

Step 3) Boot into recovery (Power off, power on + "x")


root_6.png


Step 4) Scroll to and click on the Backup/ restore option

Step 5) Restore Nandroid (either simple nandroid restore latest or advanced)

- For Simple (which restores the recent backup) :


backup_5.png


- Advanced Allows you to choose the backup to restores

backup_6.png


- Find a choose a backup that you made

backup_7.png


backup_8.png


If you do not have a backup then you can install a rom from this menu.

- example. Is to install a rom with an update.zip )
- Rename it update.zip
- Mount SD card (you can do this in the recovery menu by scrolling down from the main menu to mount options, then Enable USB mass storage, then install the update.zip {update for Windows 7} to the root of the SD card {that means that it does not get installed into any folders})


wifitether_1.png


-Install

unroot_1.png


- Allow Update.zip


unroot_2.png


- Install/sdcard/update.zip (depreciated)


unroot_3.png


Wipe data and Cache

unroot_5.png


-Reboot system.

You should now be able to install DM Updater.


Droid Images are from: ( Start Here | Root Your Droid) Rootyourdoid created by Big Lou.

Clockwork Recovery and ROM Manager are from Koush: You can learn more about Koush's Roms and creations from: CyanogenMod | Android Community Rom based on Donut tree.


For a list of other ROMS see: Android Roms - Droid Forum - Verizon Droid & the Motorola Droid Forum

__________________
 
Last edited:
Status
Not open for further replies.
Top