- Joined
- Dec 23, 2009
- Messages
- 25,489
- Reaction score
- 6,865
droidlife at the end I will have an alternate for spr instead of cw
How to: Root Android 2.2 for the Motorola DROID
On 08.26.10, In Root (unlock), Tips, by Kellex
 Now that the Motorola Droid has received Android 2.2, we get asked quite often when we’ll update our guide to rooting especially from those that were waiting on Froyo before taking the dive. Fortunately for everyone, the process takes a simple click rather than that long drawn out RSD Lite process we had to run through during the 2.1 days.
This post should act as your one-stop guide to rooting your Droid running Android 2.2, flashing a custom recovery image, and creating your first nandroid backup to get you on your way to custom ROMs and so much more.
If you are looking for reasons as to why someone would root their phone, check out this poll we ran a while back. The comments serve as one of the best compilations of reasoning you’ll find anywhere.
Enjoy!
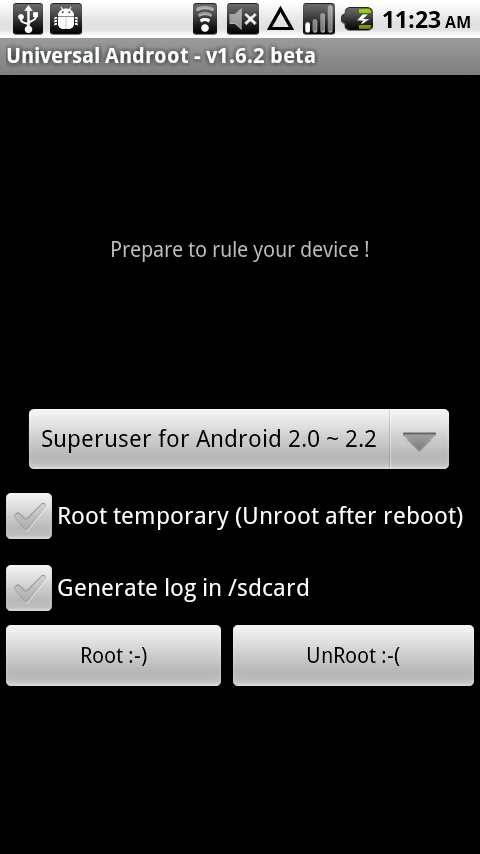
2. Open Universal Androot and tap the “Root
 ” button.
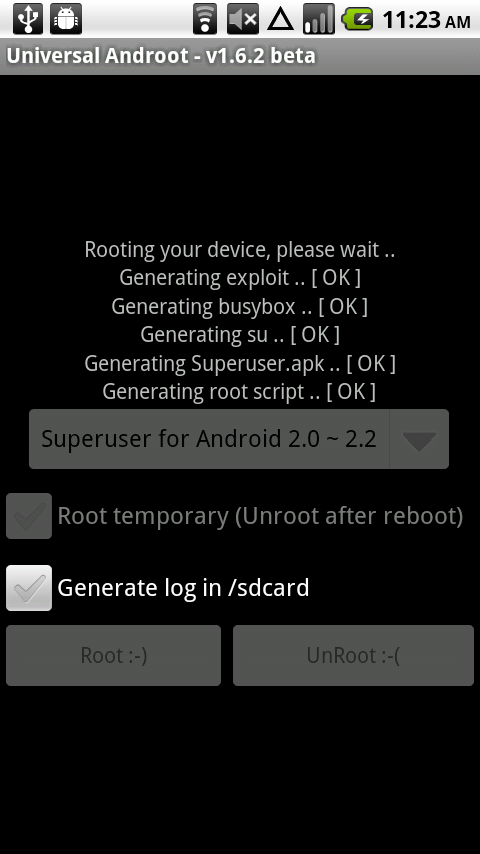
 3. It will run through a series of steps.
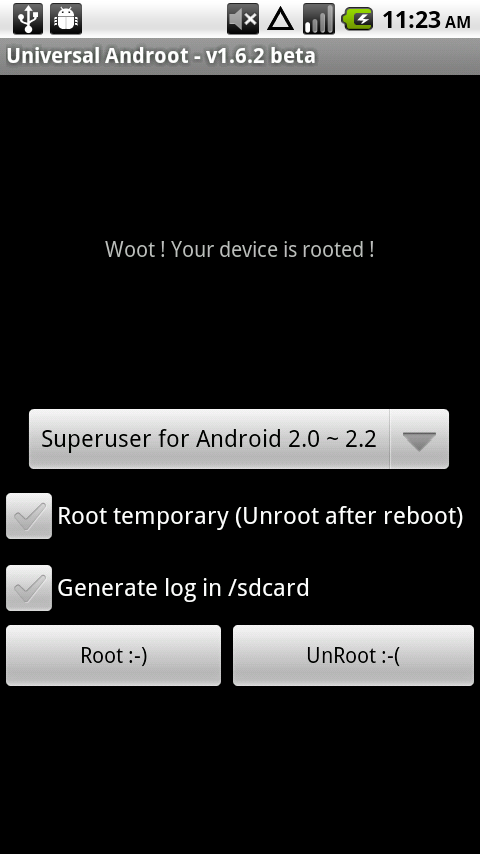
 4. If you the process completes successfully, it will look like this.
 5. Congrats! You are rooted!
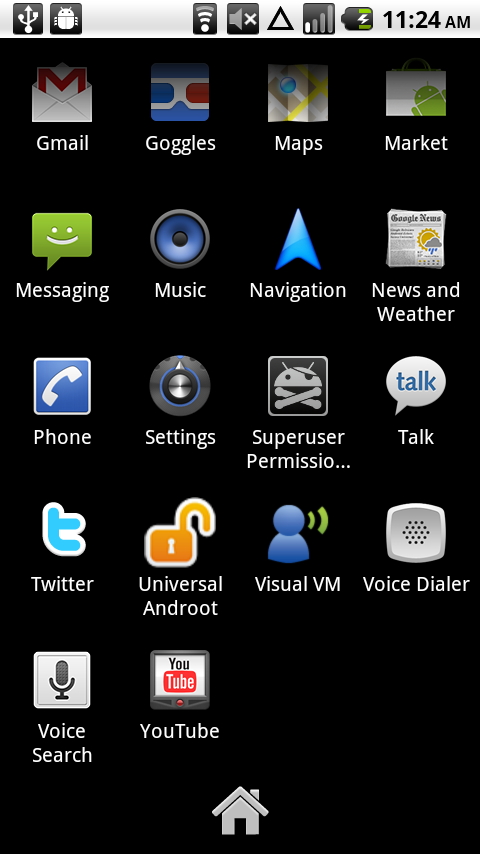
 6. Now reboot your phone to finish off the process.
1. Open the Market and search for ROM Manager. Download and install it.
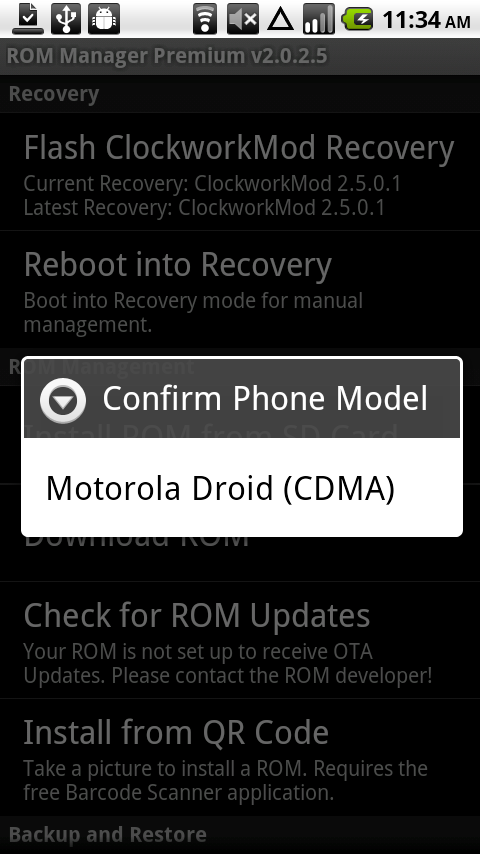
2. Open ROM Manager and select “Flash Clockwork Recovery” at the top.
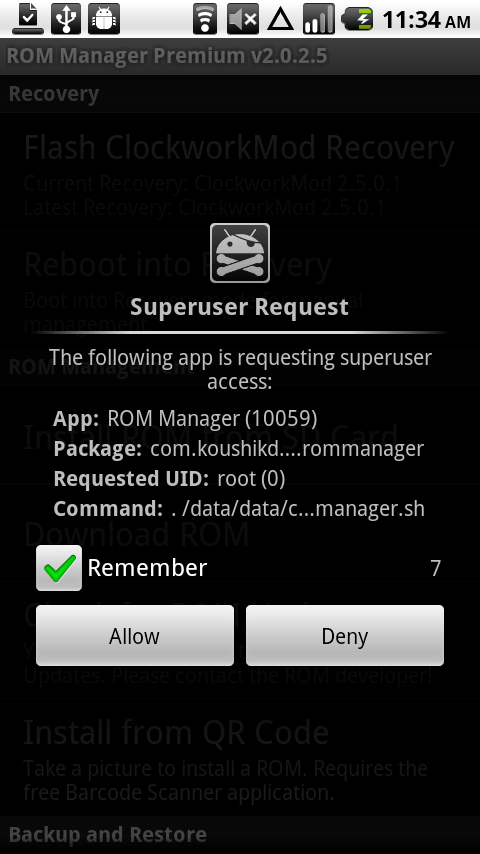
 3. If asks you for permission, check the box and tap “Allow.”
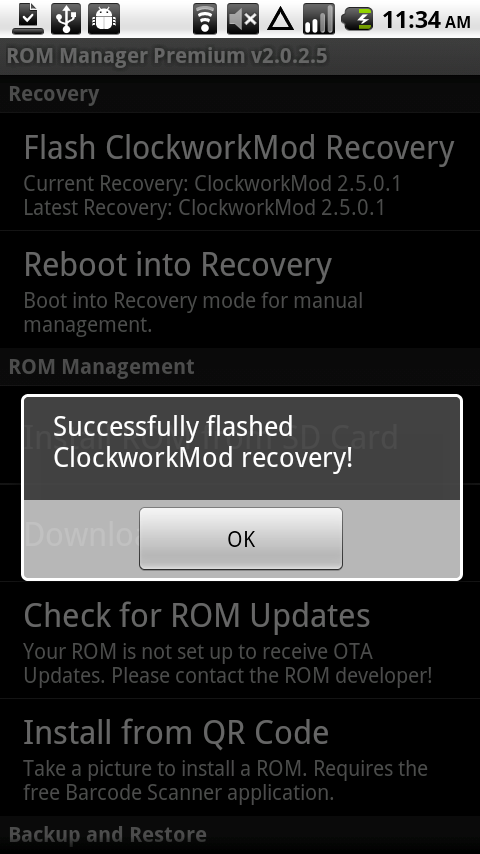
 4. ROM Manager will now flash Clockwork Recovery onto your phone. When it finishes, it will tell you.
 5. It is now time to create a full nandroid backup and prepare for custom ROMs!
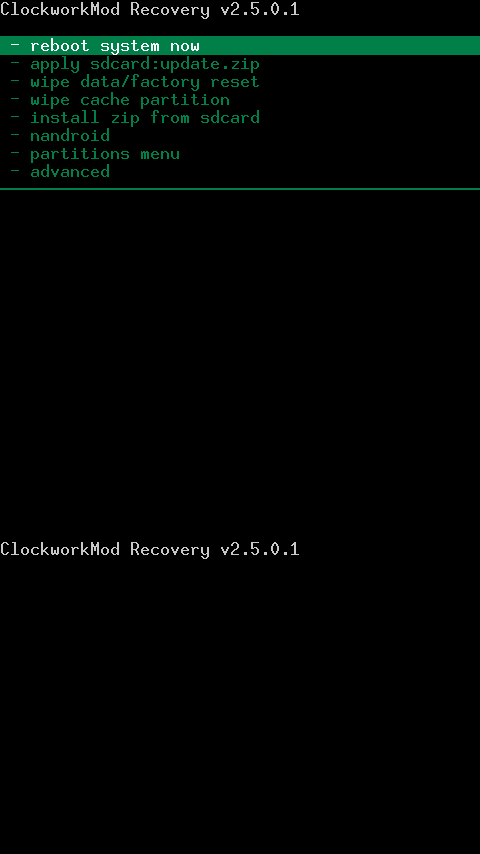
1. In ROM Manager, tap the option to “Reboot into Recovery.”
 2. Using the volume up/down keys, scroll down to “nandroid” and press the camera button.
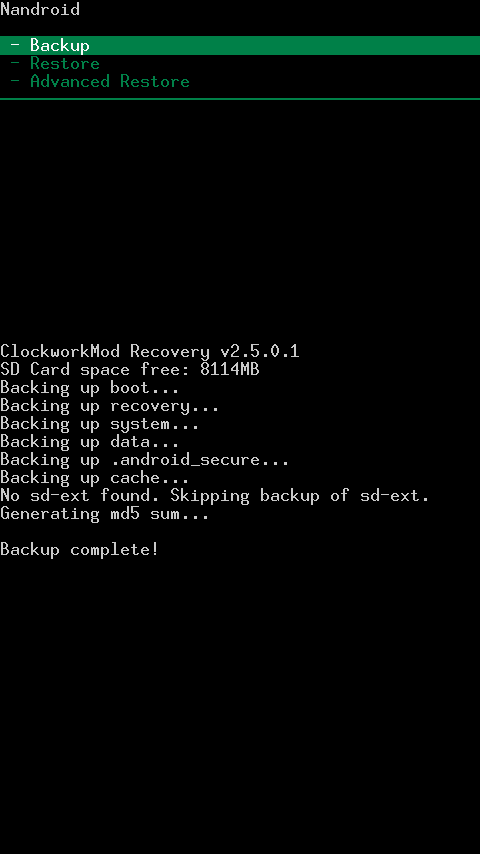
3. Choose “Backup.”
 4. Clockwork Recovery will now create a full nandroid backup of your current phone settings.
 5. When it finishes, choose “reboot phone.”
6. You now have a rooted phone, custom recovery and a full nandroid backup.
You can now participate in our Custom Theme Friday’s, flash future ROMs, Android leaks and so much more with your Motorola Droid. Hope this helped and feel free to drop your comments or questions below!
Installing SPrecovery.
Use DMupdater 12
DroidMod Updater 12
Posted on August 22, 2010 by Camel
Click this link directly from your phone’s browser, or launch DMUpdater if you already have it installed. This version does not include the exploid root, but we’re discussing releasing a version that will, since there’s already a million copycat apps out there.
For the complete list of changes, you can view the commit log. The major changes are:
Posted in DM Updater, Releases | Tagged dmupdater, release | 35 Comments
Full System Backup Using Nandroid
by Root Your Droid on Jan.20, 2010, under Guides, Root
As you learned in the Custom Recovery Image guide, SPRecovery is a powerful recovery replacement that allows you to make full system backups. What do we mean by “full system backup?” It is a package created by Nandroid, a utility within SPRecovery, that contains all of the data and system information on your phone. In essence, it’s a direct 1-to-1 copy of your Droid’s software. We can take this copy and save it in case something goes wrong. If we don’t like the way our Droid operates after a certain hack or if we brick it completely, we can take this backup and restore our phone to a working state.
It’s a very simple process and does not require a computer at all. I recommend making a Nandroid backup at least once a month and before every major hack you perform on the Droid. You can never be too safe, and it would be a nuisance to backup to an earlier state that does not have your most recent data. Remember, save often; avoid frustration.
Disclaimer

 (1/5)
(1/5)
Requirements:

Step 1: Boot into SPRecovery
Power down the Droid completely.
While holding “X” on the physical keyboard, hold the power button to turn on the phone. You may let go of the power button, but do not let go of X.

After a few seconds, a green-gold colored Android logo should appear behind the SPRecovery Console menu.

You may now let go of X and are now ready to perform a Nandroid backup.
Step 2: Perform Backup
From the SPRecovery menu, use the directional pad to navigate to “backup/restore”. Hit the gold, center button to select it. This will open a new menu with 4 options. For now, we will only concern ourselves with the “Simple Nandroid backup”. Select it at this time.

Once the process has begun, do not power off the phone or press any buttons. At the bottom of the screen, you will see a progress bar showing the progress of the system backup. In orange text, you will also see what is currently operating.

After a few minutes, the backup process will be complete. You will see “(done)” towards the bottom.

You have now successfully backed up your Droid’s system. Next, you will learn how to restore a backup you’ve made.
Step 3: Perform Restore
Navigate to the “backup/restore” menu until you see the 4 Nandroid options. This time we will select “Simple Nandroid restore (latest)”.

Once again the process is completely automatic. Just like in the backup, you will see a progress bar and informative text. After a few minutes, the restore process will be complete. You will see “(done)” towards the bottom.
Using “Simple Nandroid restore (latest)” is useful if you simply want to return to your most recent backup. However, if you want to restore to a specific backup out of a group, you will need to select “Advanced Nandroid restore”. The first menu option is “Choose backup”; select this.

You will now be presented with a list of your backups. If you’ve only made one, it will be the only option. Select the backup you’d like to revert to.

It will take you back to the previous menu where you can select and deselect certain areas of the backup to restore. You will also see the chosen backup displayed on the top. Keep the default options of BOOT, DATA, and SYSTEM checked and select “Perform Restore”.

After a few minutes, the backup process will be complete. You will see “(done)” towards the bottom. You have now successfully restored your Droid’s system. When you are ready, press power until you back out to the main SPRecovery menu. Select “reboot system now” to reboot and finish loading your backup. Hopefully you won’t ever need to use this, but if you do, it’s a lifesaver that could help avoid frustration.
This is not my work but the work of biglou from rootyourdroid
How to: Root Android 2.2 for the Motorola DROID
On 08.26.10, In Root (unlock), Tips, by Kellex

This post should act as your one-stop guide to rooting your Droid running Android 2.2, flashing a custom recovery image, and creating your first nandroid backup to get you on your way to custom ROMs and so much more.
If you are looking for reasons as to why someone would root their phone, check out this poll we ran a while back. The comments serve as one of the best compilations of reasoning you’ll find anywhere.
Enjoy!
_________________________________________
Instructions for Rooting Android 2.2:*Warning* – Rooting your Droid will void its warranty. There is also a chance that you could do permanent damage to your device and possibly “brick” it. You accept all risk should you decide to follow this process. Droid Life accepts no responsibility.
1. Download and install Universal Androot.
2. Open Universal Androot and tap the “Root
_________________________________________
*You can stop here and enjoy being rooted or you can hit up the next set of instructions to get a custom recovery image on your phone which will allow you to make full backups and flash custom ROMs._________________________________________
Installing a Custom Recovery:1. Open the Market and search for ROM Manager. Download and install it.
2. Open ROM Manager and select “Flash Clockwork Recovery” at the top.
_________________________________________
*Time to create a nandroid backup which will save you should you have a misstep somewhere in the future while flashing a custom ROM, new recovery, etc. Nandroid backups should be created constantly to ensure you have a current backup of your phone._________________________________________
Creating a nandroid backup:1. In ROM Manager, tap the option to “Reboot into Recovery.”
3. Choose “Backup.”

6. You now have a rooted phone, custom recovery and a full nandroid backup.
You can now participate in our Custom Theme Friday’s, flash future ROMs, Android leaks and so much more with your Motorola Droid. Hope this helped and feel free to drop your comments or questions below!
Installing SPrecovery.
Use DMupdater 12
DroidMod Updater 12
Posted on August 22, 2010 by Camel
Click this link directly from your phone’s browser, or launch DMUpdater if you already have it installed. This version does not include the exploid root, but we’re discussing releasing a version that will, since there’s already a million copycat apps out there.
For the complete list of changes, you can view the commit log. The major changes are:
- Compatibility with CyanogenMod
- Compatibility with Froyo
- Flash existing Durden snapshots from the root of the sdcard
- Various bug fixes
Posted in DM Updater, Releases | Tagged dmupdater, release | 35 Comments
Full System Backup Using Nandroid
by Root Your Droid on Jan.20, 2010, under Guides, Root
As you learned in the Custom Recovery Image guide, SPRecovery is a powerful recovery replacement that allows you to make full system backups. What do we mean by “full system backup?” It is a package created by Nandroid, a utility within SPRecovery, that contains all of the data and system information on your phone. In essence, it’s a direct 1-to-1 copy of your Droid’s software. We can take this copy and save it in case something goes wrong. If we don’t like the way our Droid operates after a certain hack or if we brick it completely, we can take this backup and restore our phone to a working state.
It’s a very simple process and does not require a computer at all. I recommend making a Nandroid backup at least once a month and before every major hack you perform on the Droid. You can never be too safe, and it would be a nuisance to backup to an earlier state that does not have your most recent data. Remember, save often; avoid frustration.
Disclaimer
(1/5)Requirements:
Step 1: Boot into SPRecovery
Power down the Droid completely.
While holding “X” on the physical keyboard, hold the power button to turn on the phone. You may let go of the power button, but do not let go of X.
After a few seconds, a green-gold colored Android logo should appear behind the SPRecovery Console menu.
You may now let go of X and are now ready to perform a Nandroid backup.
Step 2: Perform Backup
From the SPRecovery menu, use the directional pad to navigate to “backup/restore”. Hit the gold, center button to select it. This will open a new menu with 4 options. For now, we will only concern ourselves with the “Simple Nandroid backup”. Select it at this time.
Once the process has begun, do not power off the phone or press any buttons. At the bottom of the screen, you will see a progress bar showing the progress of the system backup. In orange text, you will also see what is currently operating.
After a few minutes, the backup process will be complete. You will see “(done)” towards the bottom.
You have now successfully backed up your Droid’s system. Next, you will learn how to restore a backup you’ve made.
Step 3: Perform Restore
Navigate to the “backup/restore” menu until you see the 4 Nandroid options. This time we will select “Simple Nandroid restore (latest)”.
Once again the process is completely automatic. Just like in the backup, you will see a progress bar and informative text. After a few minutes, the restore process will be complete. You will see “(done)” towards the bottom.
Using “Simple Nandroid restore (latest)” is useful if you simply want to return to your most recent backup. However, if you want to restore to a specific backup out of a group, you will need to select “Advanced Nandroid restore”. The first menu option is “Choose backup”; select this.
You will now be presented with a list of your backups. If you’ve only made one, it will be the only option. Select the backup you’d like to revert to.
It will take you back to the previous menu where you can select and deselect certain areas of the backup to restore. You will also see the chosen backup displayed on the top. Keep the default options of BOOT, DATA, and SYSTEM checked and select “Perform Restore”.
After a few minutes, the backup process will be complete. You will see “(done)” towards the bottom. You have now successfully restored your Droid’s system. When you are ready, press power until you back out to the main SPRecovery menu. Select “reboot system now” to reboot and finish loading your backup. Hopefully you won’t ever need to use this, but if you do, it’s a lifesaver that could help avoid frustration.
This is not my work but the work of biglou from rootyourdroid
Last edited:
